Testing Guide
The MassFlow project is committed to maintaining high code quality standards. To ensure the correctness and stability of functionality, we use pytest as our primary unit testing framework.
This document will guide you on how to run existing tests and understand the current test coverage.
Before reading, you can refer to this video (Chinese):
https://www.bilibili.com/video/BV1KZWKz3Ek5/
Then refer to the official documentation website: https://docs.pytest.org/en/stable/
Introduction to Pytest
pytest is a mature and powerful Python testing tool known for its simple syntax and strong extensibility.
Basic Usage
In the MassFlow project, all test code is located in the tests/ directory. You can run tests by executing the following commands in the terminal at the project root:
Run all tests:
pytestRun tests for a specific file:
pytest tests/test_read.pyShow detailed output (including passed tests):
pytest -vTest Plugins and Configuration
MassFlow's test environment configuration aims to simplify the development process. Although pytest is powerful on its own, we typically use it in conjunction with the following plugins or modes (depending on the specific development environment configuration):
- pytest-memray: Used to track code memory consumption.
- pytest-benchmark: Used to test code execution time.
- pytest-cov: Used to generate code coverage reports, helping developers understand which lines of code are not covered by tests.
Basic Testing Workflow
Testing goals mainly focus on three aspects:
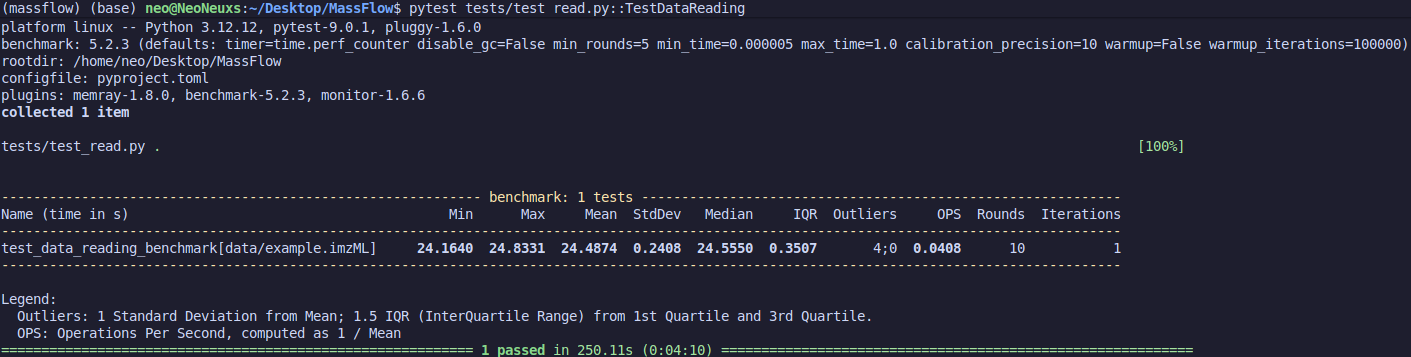
First is execution time. In basic test results, we need to use plugins to achieve high-precision time measurement, such as:
@pytest.mark.benchmark(timer=time.perf_counter)Benchmark provides a baseline testing method for code execution time, including multiple runs and warm-ups, to avoid inaccuracies caused by system fluctuations.
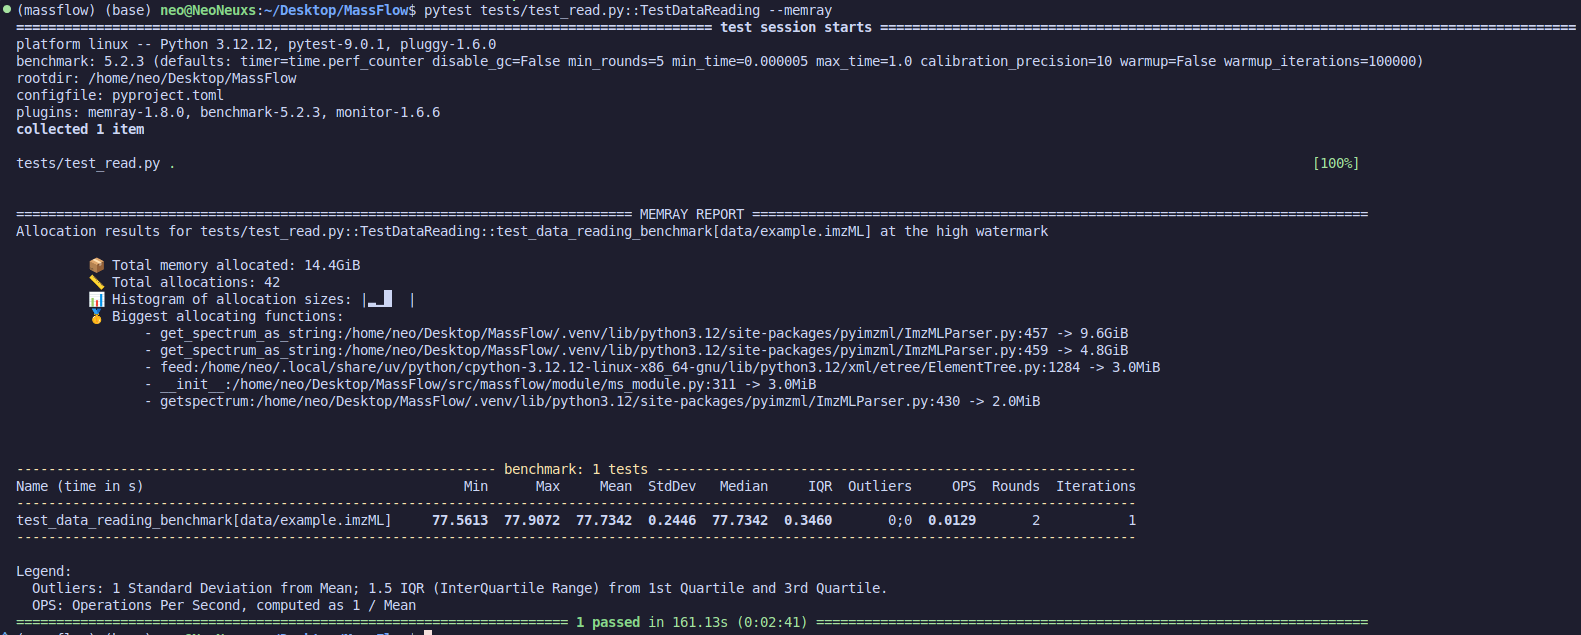
Second is memory usage. Using pytest --memray activates the plugin to calculate memory consumption during execution. Note that when the plugin is active, execution time may be inaccurate, so focus only on memory usage.
Finally, correctness of results. Judging whether the code runs correctly depends on the purpose of the code. For example, for noise reduction code, one should compare the signal after denoising with the original signal's SNR and similarity, using these two metrics for judgment. We won't go into detail here; each code has its own testing requirements. Design them according to the situation. Basic methods include:
- Quantitative metric testing
- Comparison testing with standard code results (e.g., comparing with Cardinal under the same methods and parameters)
Overview of Existing Tests
The current test suite mainly covers core data processing and utility modules. Here is a detailed introduction to the test files in the tests/ directory:
1. Noise Reduction Tests (test_noise_reduction.py)
This module mainly verifies noise processing algorithms for mass spectrometry data.
- Test Goal: Verify if the output of smoothing algorithms (such as Savitzky-Golay filter) and baseline correction algorithms meets expectations.
- Related Documentation: For details, refer to the Noise Reduction Documentation.
2. Data Reading Tests (test_read.py)
This is the foundational test module of the project, ensuring data can be loaded correctly.
- Test Goal: Verify if the file reader can correctly parse raw data files and convert them into the project's internal data structures.
- Key Points: Check the integrity of metadata extraction and mass spectrum data.
3. Utility Function Tests (test_tools.py)
This module contains unit tests for general utility functions in the project.
Contributing Tests
We strongly recommend including corresponding test cases when submitting new features or// filepath: docs/en/test.md