Hexo+github+Markdown博客搭建
![[lab.magiconch.com][福音戰士標題生成器]-1727549184424](https://s2.loli.net/2024/09/29/6Xo9VwZBhLIJ8Yk.jpg)

[TOC]
特性:
- build工具链支持跨平台使用:linux & windows
- 部署支持多平台:linux(32&64)&windows&github&docker
- 一次部署即可使用,支持markdown,mermaid,math公式,TOC目录等markdown特性。
工具:
markdown工具:Typora
跨平台后端:Nginx
部署平台:orangepi R1 cortex-A7架构 32位双核 & github.io
Hexo工具链配置
hexo工具包含npm,这里以linux系统为示例,其他系统操作类似:
https://nodejs.org/zh-cn/download/package-manager
# installs nvm (Node Version Manager)
curl -o- https://raw.githubusercontent.com/nvm-sh/nvm/v0.40.0/install.sh | bash
# download and install Node.js (you may need to restart the terminal)
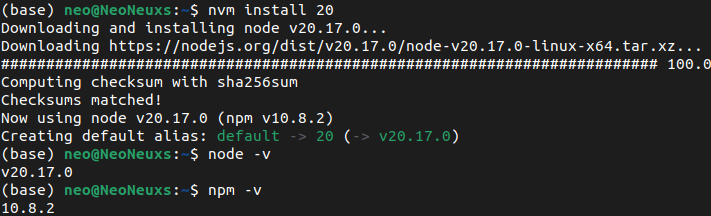
nvm install 20
# verifies the right Node.js version is in the environment
node -v # should print `v20.17.0`
# verifies the right npm version is in the environment
npm -v # should print `10.8.2`
在curl导出环境变量之后记得重新打开命令行,执行下面的命令,安装效果如下:
安装hexo:
npm install hexo-cli -g
安装过程很慢,而且没有任何提示。安装完成之后效果如下:
(base) neo@NeoNeuxs:~$ npm install hexo-cli -g

added 53 packages in 6s

14 packages are looking for funding
  run `npm fund` for details
安装对应主题的插件,这里使用的是claudia,根据其文档效果如下:
hexo官方针对主题使用的文档:https://hexo.io/zh-cn/docs/themes 理解theme需要先看看,后边不会太详细介绍。
我们需要将对应的主题clone到theme文件夹,然后再修改对应的_config.yml,包含项目的_config.yml和主题的_config.yml两者不一样,修改的时候要注意。
这里使用的cluadia主题在:https://github.com/Haojen/hexo-theme-Claudia
根据主题要求安装包,效果如下:
(base) neo@NeoNeuxs:~$ npm install hexo-renderer-pug

added 52 packages in 7s

13 packages are looking for funding
  run `npm fund` for details
(base) neo@NeoNeuxs:~$ npm install hexo-renderer-dartsass

added 6 packages, and audited 59 packages in 4s

15 packages are looking for funding
  run `npm fund` for details

found 0 vulnerabilities
(base) neo@NeoNeuxs:~$ npm install hexo-generator-feed

added 43 packages, and audited 102 packages in 5s

25 packages are looking for funding
  run `npm fund` for details

found 0 vulnerabilities
(base) neo@NeoNeuxs:~$ npm install hexo-filter-flowchart

added 3 packages, and audited 105 packages in 3s

25 packages are looking for funding
  run `npm fund` for details

found 0 vulnerabilities
(base) neo@NeoNeuxs:~$ npm install hexo-renderer-mathjax
npm warn deprecated ejs@1.0.0: Critical security bugs fixed in 2.5.5

added 2 packages, and audited 107 packages in 4s

25 packages are looking for funding
  run `npm fund` for details

2 critical severity vulnerabilities

Some issues need review, and may require choosing
a different dependency.

Run `npm audit` for details.
安装完成后,修改项目的配置文件,这里贴一下我自己的:
# Hexo Configuration
## Docs: https://hexo.io/docs/configuration.html
## Source: https://github.com/hexojs/hexo/

# Site
title: Hexo
subtitle: ''
description: ''
keywords:
author: NeoNexus
language: chinese
timezone: ''

# URL
## Set your site url here. For example, if you use GitHub Page, set url as 'https://username.github.io/project'
url: http://neonexusx.github.io
permalink: :year/:month/:day/:title/
permalink_defaults:
pretty_urls:
  trailing_index: true # Set to false to remove trailing 'index.html' from permalinks
  trailing_html: true # Set to false to remove trailing '.html' from permalinks

# Directory
source_dir: source
public_dir: public
tag_dir: tags
archive_dir: archives
category_dir: categories
code_dir: downloads/code
i18n_dir: :lang
skip_render:

# Writing
new_post_name: :title.md # File name of new posts
default_layout: post
titlecase: false # Transform title into titlecase
external_link:
  enable: true # Open external links in new tab
  field: site # Apply to the whole site
  exclude: ''
filename_case: 0
render_drafts: false
post_asset_folder: false
relative_link: false
future: true
syntax_highlighter: highlight.js
highlight:
  line_number: false
  auto_detect: false
  tab_replace: ''
  wrap: false
  hljs: false
prismjs:
  preprocess: false
  line_number: false
  tab_replace: ''

# Home page setting
# path: Root path for your blogs index page. (default = '')
# per_page: Posts displayed per page. (0 = disable pagination)
# order_by: Posts order. (Order by date descending by default)
index_generator:
  path: ''
  per_page: 10
  order_by: -date

# Category & Tag
default_category: uncategorized
category_map:
tag_map:

# Metadata elements
## https://developer.mozilla.org/en-US/docs/Web/HTML/Element/meta
meta_generator: true

# Date / Time format
## Hexo uses Moment.js to parse and display date
## You can customize the date format as defined in
## http://momentjs.com/docs/#/displaying/format/
date_format: YYYY-MM-DD
time_format: HH:mm:ss
## updated_option supports 'mtime', 'date', 'empty'
updated_option: 'mtime'

# Pagination
## Set per_page to 0 to disable pagination
per_page: 10
pagination_dir: page

# Include / Exclude file(s)
## include:/exclude: options only apply to the 'source/' folder
include:
exclude:
ignore:

# Extensions
## Plugins: https://hexo.io/plugins/
## Themes: https://hexo.io/themes/
theme: claudia

# Deployment
## Docs: https://hexo.io/docs/one-command-deployment
deploy:
  type: git
  repository: git@github.com:######/#########github.io.git
  branch: main
 # mermaid chart
mermaid: ## mermaid url https://github.com/knsv/mermaid
  enable: true  # default true
  options:  # find more api options from https://github.com/knsv/mermaid/blob/master/src/mermaidAPI.js
    #startOnload: true  // default true
主要关闭了代码高亮,添加了mermaid支持,修改主题为claudia,添加了一些信息,同时添加了部署的git信息,还有在对应的服务器上部署的文件信息,这样部署的时候只需要一条命令就能完成多平台的部署。
# main menu navigation
menu:
  Home: /
  About: /about
  Archive: /archives

widgets:
  - tag
  - archive
  - recent_posts
  - category
  - profile

# social config
social:
  zhihu:
  twitter: /
  facebook: /
  instagram: /
  github: https://github.com/NeoNexusX

user:
  name: NeoNexus
  avatar:
  location: XiaMen
  description: YOU CAN REDO
  footnotes: # footnotes

# documents: https://github.com/utterance/utterances
# API config: https://utteranc.es/
comment_utteranc:
  enable: true
  repo: Haojen/Claudia-theme-blog # your blog repo


# documents: https://valine.js.org/quickstart.html
comment_valine:
  enable: true
  appId: ############
  appKey: #########

comment_disqus:
    enable: false
    url:  # the url of your website main domain like this https://xxx.xxx/
    name: # the short name in disqus

# dark
# light
# user-can-set
appearance: dark # Default value is auto

# Miscellaneous
favicon: images/favicon.ico

friend_links:
  - title: Google
    link: https://www.google.com/
  - title: Github
    link: https://www.github.com/

# Google Analytics
ga_track_id:
ga_domain:

# Baidu Analytics
ba_track_id:

# picture of about page
about_pic: about.png

image_zoom:
  enable: true
主题的设置文件隐藏了一些关键信息,所以没办法直接使用,主要修改在评论系统引入,一些关键信息修改。
mermaid添加支持
mermaid是常见的markdown流程图绘制语言,为了添加支持,我们的思路如下:
首先添加对应的npm包支持,然后引入对应的mermaid渲染js代码,调用对应的mermiad初始化函数,引入mermaid支持。
网上的教程思路都是大致如下,但是都是基于不同的主题来实现的,这里使用的claudia使用的模板语言和网上介绍的不一样,我们需要修改一下对应的的代码:
在此路经下/blog_dev/themes/claudia/layout存放着如下关于布局的文件内容:

pug后缀代表着对应的模板语言,我们需要在对应的地方插入对应的js代码,同时还需要满足pug的语法要求。考虑到需要在所有内容初始化完成之后使用CDN将mermaid引入,我们选择比较靠后的布局文件,防止影响到其他部分的初始化,这里挑选post部分,添加代码如下:
    script(src=`https://unpkg.com/mermaid@10.6.1/dist/mermaid.min.js` onload="initMermaid()")
    script.
      function initMermaid() {
       console.log("fuck you");
        if (window.mermaid) {
          console.log("fuck you");
          mermaid.initialize({ theme: 'forest' });
        }
      }
其中版本部分本应该使用confiog文件的对象来获取,但是本人不是专业前端,这里引用不到对应的theme对象,没办法只能写死到这里。
添加之后,我们就可以使用了。
使用命令:
(base) neo@Mark06-U:~/Desktop/blog_dev$ hexo generate
INFO  Validating config
INFO  Start processing
INFO  Files loaded in 238 ms
INFO  Generated: 2024/09/27/hello-world/index.html
INFO  Generated: archives/2024/index.html
INFO  Generated: atom.xml
INFO  Generated: archives/2024/09/index.html
INFO  Generated: 2024/09/28/Bionet-Server01使用说明/index.html
INFO  Generated: archives/index.html
INFO  Generated: index.html
INFO  7 files generated in 14 ms
构建成功之后使用:
hexo s
开启测试服务器。
(base) neo@Mark06-U:~/Desktop/blog_dev$ hexo s
INFO  Validating config
INFO  Start processing
INFO  Hexo is running at http://localhost:4000/ . Press Ctrl+C to stop.
部署在cortex-A7之上
cortex-A7是一个很老的arm架构了,32位的性能很差,但是我有一个orangepi_r1没有用处,所以拿来部署在内网,关于部署到github.io的文章很多,这里不再赘述,主要关键点在于如何将两个平台的内容进行同步更新,这样方便后续内容的更新与维护。
首先我们要在ubuntu16.04上部署一个nginx服务器,没错H2+跑的是对应已经做好的镜像,这里我也不再赘述,每一个厂家都有做好的镜像来使用。
sudo apt update
sudo apt install nginx
使用命令:
sudo systemctl status nginx
如果没有报错,那说明成功了:
orangepi@orangepir1:~$ sudo systemctl status nginx
● nginx.service - A high performance web server and a reverse proxy server
   Loaded: loaded (/lib/systemd/system/nginx.service; enabled; vendor preset: enabled)
   Active: active (running) since Fri 2021-04-02 07:51:53 UTC; 2h 54min ago
  Process: 1192 ExecStart=/usr/sbin/nginx -g daemon on; master_process on; (code=exited, status=0
  Process: 1101 ExecStartPre=/usr/sbin/nginx -t -q -g daemon on; master_process on; (code=exited,
 Main PID: 1203 (nginx)
   CGroup: /system.slice/nginx.service
           ├─1203 nginx: master process /usr/sbin/nginx -g daemon on; master_process on
           ├─1204 nginx: worker process
           ├─1205 nginx: worker process
           ├─1206 nginx: worker process
           └─1207 nginx: worker process
接下来我们需要将博客发布到这台服务器上,就需要修改nginx配置,然后转移到我们对应的文件夹,作为nginx的起始目录。
使用命令:
cd /etc/nginx/sites-available/
在这里我们修改default文件:
server {
        listen 80 default_server;
        listen [::]:80 default_server;

        root /home/orangepi/blogs;

        # Add index.php to the list if you are using PHP
        index index.html index.htm index.nginx-debian.html;
        server_name blogs;

        location / {
                # First attempt to serve request as file, then
                # as directory, then fall back to displaying a 404.
                try_files $uri $uri/ =404;
        }
}
每个修改的对象是什么意思我不再赘述,只需要知道修改了,根目录,location管理部分,其他没有修改。
然后我们重启nginx,让其重新载入设置;
sudo systemctl reload nginx
sudo systemctl restart nginx
当然这里设置的blogs文件夹,需要你提前创建好,同时这个文件夹,在你本地电脑推送到服务器的时候也是要有一定的权限的,所以不要使用sudo来创建。
重启之后我们应该看见,这样一个博客就创建完成了~
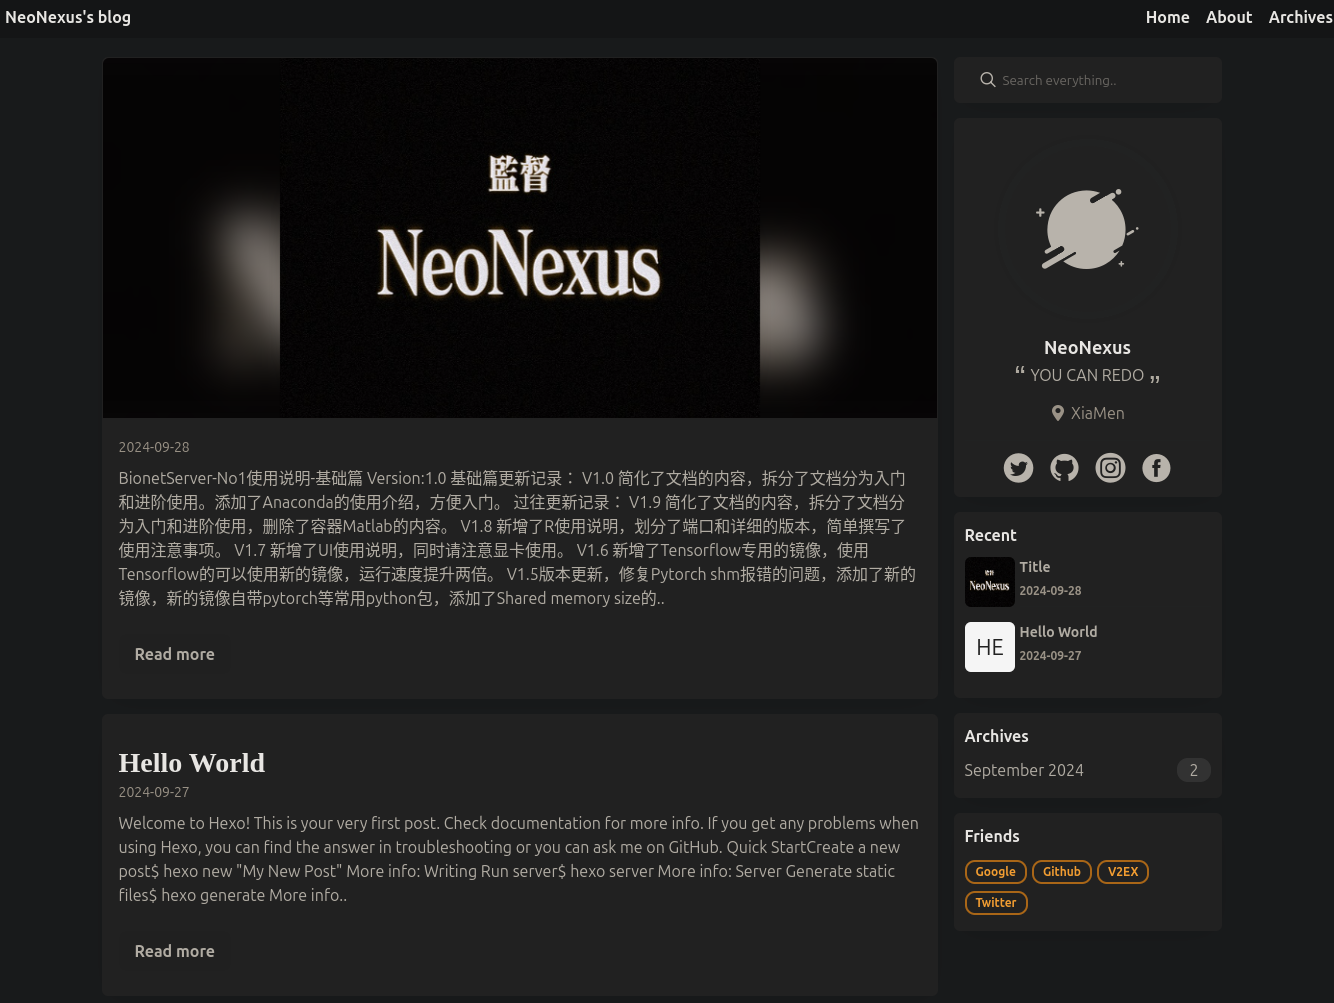
完成多平台同步推送
多平台同步推送依赖于hexo的deploy功能,根据官方文档,我需要向git和一台服务器进行推送,为了满足这个要求,我们将项目的配置文件修改为如下形式:
deploy:
  - type: git
    repository: git@github.com:NeoNexusX/NeoNexusX.github.io.git
    branch: main
  - type: rsync
    host: 你的服务器ip
    user: 你服务器user
    root: /home/orangepi/blogs
    port: 22
    delete: true
    verbose: true
    ignore_errors: false
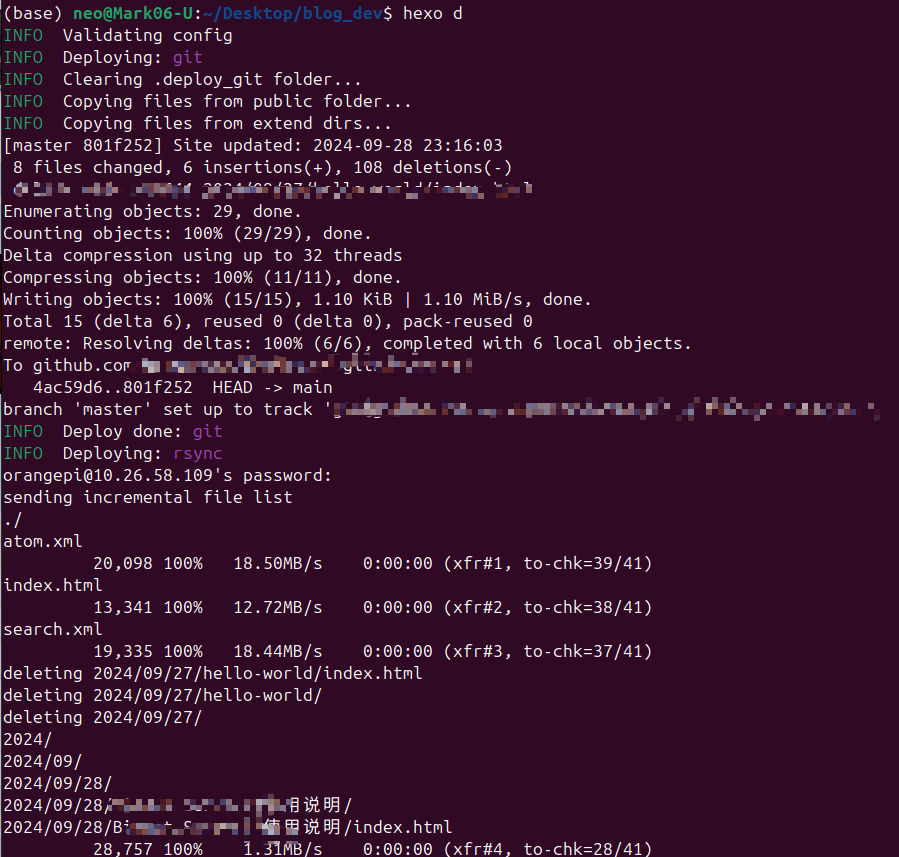
然后使用命令:
hexo deploy
实现推送,效果如下:
添加Math公式支持
依据博客修改:
https://pku-zyf.github.io/formula/
将上文post.pug添加如下脚本内容:
    if theme.mathjax.enable
      script(type="text/x-mathjax-config").
        MathJax.Hub.Config({
          tex2jax: {
            inlineMath: [ ['$','$'], ["\\(","\\)"] ],
            processEscapes: true,
            skipTags: ['script', 'noscript', 'style', 'textarea', 'pre', 'code']
          }
        });
        MathJax.Hub.Queue(function() {
          var all = MathJax.Hub.getAllJax(), i;
          for(i=0; i < all.length; i += 1) {
            all[i].SourceElement().parentNode.className += ' has-jax';
          }
        });
      script(type="text/javascript", src=theme.mathjax.cdn)
注意缩进和空格,剩下完全和博客内容一致,不再赘述,只不过不需要打开MathJax开关部分内容。